Polyester body filler: mixing, applying and sanding without pinholes
Everyone knows how to put filler on. Far fewer know how to put it on so they only have to sand it once. Between poorly prepared metal, hardener added by guesswork and a coat that's too thick, filler can cost you an hour per repair.
Preparing the metal before filling
Polyester filler adheres to a clean, dry, keyed surface. After the dent repair, degrease, then sand the area, generally with P80, going a few centimetres beyond the low spot. On bare metal, remove every trace of rust; on old paint, check that it's sound and well bonded. Degrease again after sanding and blow off.
Check the depth too. Filler isn't meant to fill a two-centimetre hole: most technical data sheets limit the thickness to a few millimetres. If you're going beyond that, go back to the stud welder or the hammer. Well-straightened metal means less filler, less sanding and a repair that stays put.
Watch out for special substrates as well. On galvanised steel or aluminium, not all polyester fillers behave the same way, and some need a primer first. On plastics, use flexible fillers designed for the purpose. The filler's technical data sheet lists the approved substrates: that's what to check before filling a part you're not familiar with.
Measuring the hardener: the step that makes all the difference
Polyester filler cures thanks to a peroxide hardener, the small tube of paste. Most manufacturers recommend around 2 to 3% by weight, which in the workshop means a strip of hardener across the diameter of the dollop of filler. The technical data sheet is the reference, but that's the idea: very little hardener is enough.
Too little, and the filler stays greasy, clogs the abrasive and doesn't cure right through. Too much is more insidious: the filler goes off in a few minutes, you don't have time to smooth it, and the excess peroxide can later migrate into the paint layers and cause staining or discolouration, especially under light colours. You see it months later, at the customer's.
Remember to knead the filler in the tin before taking some out, and to knead the hardener tube as well. Both separate over time, and a filler with resin that has risen to the surface no longer behaves as it should.
Mixing without trapping air
This is where most pinholes start. You don't whip filler like mayonnaise: press it flat on the board with the spreader, fold it over and press it flat again, until the colour is perfectly even, with no streaks. The movement should push air out, not work it in.
Use a smooth, clean mixing board, never cardboard, which soaks up the resin. Mix small amounts: at 20 °C you generally have a few minutes' working time before the filler starts to go off, and that time drops quickly when it's hot.
In winter it's the other way round: filler stored in a cold room gets thick, is hard to work and cures slowly. You're then tempted to add more hardener to speed it up, which brings you back to the problems above. The right answer is to keep the tin in the heated workshop and let the panel warm up before applying. An infrared lamp on reduced power can help, as long as you don't cure the surface of the filler too fast.
Applying thin, cross-hatched coats
First a thin pass, spreader well angled and pressed down firmly, to wet the metal properly and push the filler into the scratches. It's this key coat that drives the air out of the interface. Then build it up in cross-hatched passes, each time pulling slightly beyond the previous one, and keeping the thickness just above the final shape.
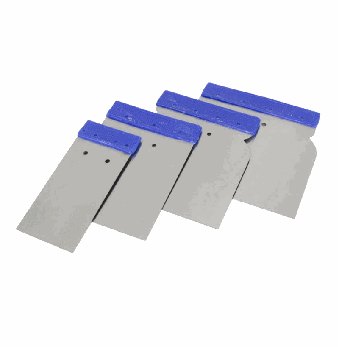
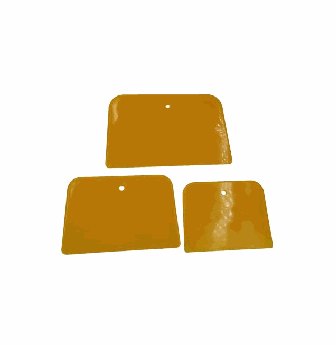
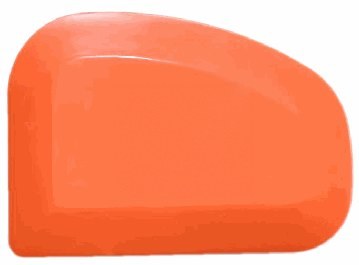
Two medium coats are better than one thick one. Very thick filler heats up as it cures, shrinks more and often hides air bubbles. On curves, a flexible plastic or rubber spreader follows the shape better; on large flat areas, a wide stainless steel spreader gives a straighter surface.
On a body line or a swage line, work in two stages: fill one side of the line, let it cure, sand a crisp edge, then do the other side. Trying to do both sides at once almost always gives a soft line that has to be redone. A strip of masking tape along the edge helps keep a sharp line.
Sanding and hunting down pinholes
Sand once the filler is hard but not yet brittle, which at 20 °C generally takes twenty to thirty minutes, less under infrared. Rough shaping is often done with P80, then refined with P120 and finished with P180 or P240 before primer, changing grit as soon as the scratches from the previous one have gone.
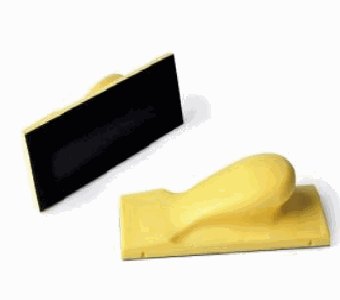
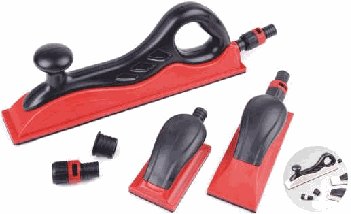
A sanding block is essential: long on flat areas, flexible on curves. Apply a guide coat before the last grit — it shows up both the low spots and the pinholes. If you can see pinholes, don't count on the primer to fill them: a thin pass of stopper, or polyester filler pressed in hard with the spreader, followed by a light sand, sorts the problem out properly.
- P80: shaping
- P120: refining
- P180 to P240: finishing before primer
- Guide coat before the last grit
Humming filler and its tools
Humming 701 polyester body filler (1 kg) comes with its hardener, for filling and panel repair work. For application, the ACC-109 stainless steel spreader set, the ACC-106 plastic spreaders and the ACC-107 rubber spreaders cover flat areas and curves alike. For sanding, the ABR-104 or ABR-113 discs from P80 to P240, the ABR-105 and ABR-109 sanding blocks, and the ABR-107 dust-extraction block if you work dust-free. Your Humming distributor can tell you about availability.
The values given here are workshop guidelines. The product's technical data sheet always takes precedence.