Charger-starters in the workshop: protecting the electronics
A vehicle that spends three days in the bodyshop, doors open, ignition on for diagnostics, lights on for checks, often ends up with a flat battery and sometimes ECUs full of fault codes. The charger-starter is one of the tools that prevent these nasty surprises, provided it's used properly.
Why battery voltage matters so much
A recent vehicle carries dozens of ECUs. When the voltage drops below a certain threshold, some go into limp mode, log fault codes or lose their learned values. You then end up with a car showing warning lights, a window that no longer goes down automatically or a sunroof that needs resetting. Nothing serious in most cases, but time lost and a customer asking questions.
In the bodyshop, there are plenty of ways to drain a battery: ignition on while checking the lights, doors open for hours, interior ventilation running during checks, ADAS calibration after a bumper replacement. Having a charger connected during these stages isn't a luxury.
Charging, maintaining, supplying: three different uses
Charging means putting energy back into a discharged battery. A modern charger does this in stages, with a diagnostic, a high-current stage, a finishing stage and maintenance, then stops by itself when the battery is full. That's the usual use for a battery run down by the vehicle standing.
Charge maintenance keeps the battery topped up while you work. For long, power-hungry operations, such as ECU programming or certain software updates, manufacturers often require a stabilised power supply capable of delivering a high current at a very stable voltage. That's not quite the same device as a charger-starter: check the manufacturer's requirements before programming.
Finally, jump starting supplies a high current long enough to crank the engine. It's the function that gets you out of trouble in the morning when a vehicle parked outside refuses to start.
Starting a vehicle safely
Jump starting is done with the battery in place and connected. Cranking a modern vehicle without a battery, on the workshop starter alone, exposes the electronics to sharp voltage fluctuations. Select the right voltage, 12 or 24 V, connect, wait a few moments, then crank the starter in short bursts. If the engine doesn't fire after two or three attempts, look for the fault instead of persisting.
The power you need depends on the vehicles you take in. A small petrol city car starts with little current, a diesel van in cold weather needs much more, and a lorry or plant machine moves up to 24 V. An oversized unit isn't dangerous if used properly, but one that's too small overheats, runs out of steam and starts nothing. For a bodyshop that mainly takes light vehicles and a few vans, a mid-range 12 / 24 V model covers most situations.
Once the engine is running, switch off the start function before disconnecting, and remove the clamps in the reverse order of connection. A battery that has needed a jump start then deserves a proper charge, and a test: it may be at the end of its life.
Connecting correctly: the order and the earth point
First connect the positive clamp to the positive terminal or to the connection point specified by the manufacturer, then the negative clamp to an earth point on the body or engine, and only then switch the charger on. To disconnect, do the reverse. These are simple steps that prevent sparks near a battery, which can give off hydrogen while charging.
On many recent vehicles, the negative battery terminal carries a sensor that measures the state of charge. Manufacturers then require the negative clamp to be connected to a dedicated earth point, not directly to the terminal, so that the sensor sees the charging current. The vehicle handbook shows these points, often under the bonnet.
The AGM and EFB batteries in stop-start vehicles need suitable charging. Before connecting, check that the charger is suitable for the battery technology.
- Positive clamp first, then earth
- Charger switched on last
- Earth point specified by the manufacturer
- Battery technology checked before charging
During bodywork
Before welding with MIG, a spot welder or a spotter, most manufacturers' procedures require the battery to be disconnected: never leave a charger connected to a vehicle being welded. Once welding is finished, reconnect, then put the charger back on maintenance during reassembly, checks and calibration.
Think about booth baking too. A vehicle being baked at 60 °C must not have a charger sitting on the bodywork or in the engine bay. Connect it before or after, and keep the cables out of the paint area.
A useful habit: note the battery condition on the job card when the vehicle arrives. If it's already weak, you know before you start, you put it on charge from day one, and you avoid discovering at handover that the car won't start. The customer will appreciate being told.
Humming charger-starters
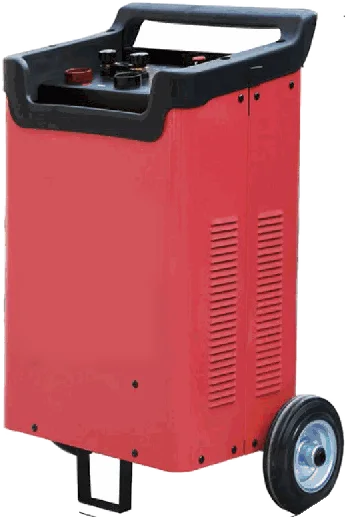
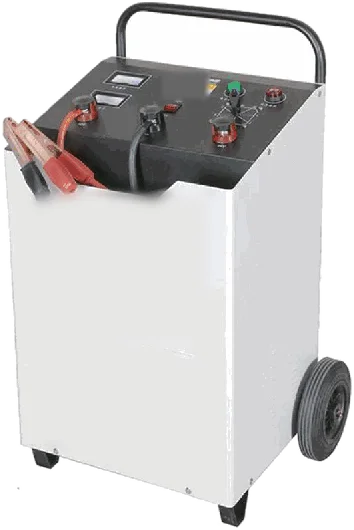
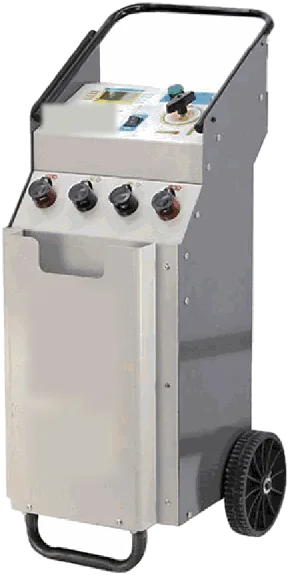
The HE-B401 charger-starters (200 to 720 A, 12 / 24 V) charge in 7 stages with automatic shut-off and warn of short circuits and reverse polarity. The HE-B402 transformer models (400 to 900 A) also cover HGVs and plant, and the fan-cooled HE-B403 models (600 to 1,000 A) display voltage, current, time and state of charge for heavy-duty use. Your Humming distributor will help you choose according to the vehicles you take in.
The values given here are workshop guidelines. The product's technical data sheet always takes precedence.